Me Like Eat Special: More Than You Ever Wanted To Know About How To Make Clear Ice Cubes (And Spheres) At Home
So clear you can barely see it… .
Years ago, any old ice cube would do for my drink. It didn’t matter what shape or size, its clarity or any of that. All it had to do was cool the drink down. Sure, I’d seen some “novelty” jumbo cubes – or even spheres – at the odd restaurant or bar, and they’d get me wondering “isn’t that neat,” but it always came off like a gimmick.
That began to change for me at, of all places, the epic tailgate thrown by these insane gourmands at a Jets game. God forbid you walk into this tailgate with a burger or hot dogs. These guys were cooking truffle oil this, cinammon sugar that, hand made ice cream here, butterflied pork there (or whatever). It was a competition between the participants to see who could prepare the best, not exactly fancy, but deliberate, thoughtful and delicious food. And at this tailgate Brian pulled out the “king cube,” and it was downhill from there.

Your garden variety Tovolo King Cube.
You see, once you’ve had the king cube in your scotch, there really is no turning back. They’re about 2 inches by 2 inches, melt slowly, fill the glass admirably, and add a douchey swagger to your tumbler. Tovolo makes silicon molds for something like $9 and the sheer joy they added to my already joyful scotch-drinking experience was remarkable. It completely transformed my drinking experience and I was very happy with that for a long time. Honestly, I highly recommend them, although you will have taken your first step down a certain path… .
Everything was great until Stephanie showed up with a lovely gift, the ice sphere mold. I was immediately intrigued and very quickly hooked. These were even larger, and since they were round, they melted even more slowly. The game had changed again.
That is when the true descent into madness began.

See all those fault lines and fractures?
You see, when you make the standard-issue Tovolo ice sphere, what you get are what I like to call “Kryptons.” Why Krypton? Because when you pour your drink over them, the numerous fault lines and fractures in the sphere wear away almost immediately, and then your sphere explodes, like Superman’s birthplace. So while I like the shape and size, the actual drinking experience was initially worse than with the king cube, since the Krypton would descend from sphere into chunks of ice in fairly rapid fashion.
What to do about this?
Well the Internet is mercifully helpful on the topic. A few searches turned up some guidance, which I am guessing is also what brought you here. However those methods really seemed somewhat elaborate. Spray foam? Freezing a whole pot for just one sphere? And was I really willing to spend more than $70 on an excellent-looking device to get a clear ice sphere? How about $700 or more? The answer to these was no.
So how do you get a clear ice cube or sphere?
Well it turns out it depends on how you freeze the ice. If you’ve come this far, you probably already know that the reason the ice in any given cube tray is cloudy is because the cold is attacking the water from all directions simultaneously. Consequently, ice forms from the outside in, trapping air pockets and impurities in the cloudy center you see in any given cube.
Therefore, you must control the direction from which the freeze is occurring to force all these impurities out without them getting trapped in the center of your cube or sphere.

The early effort: Mold inverted (hole down), surround with water.
At first, I wasn’t quite willing to go “all in” and freeze a cooler of water, which I ultimately wound up doing. I started with a tupperware tray and the Tovolo ice sphere mold. All I did was fill the mold, invert it so that the hole at the top was now at the bottom, and place it in a tupperware tray also filled with water to help control the freeze. I also used a plastic ring to help keep it off the bottom of the tupperware so the cloudiest bit would remain at the bottom. It worked pretty darn well.

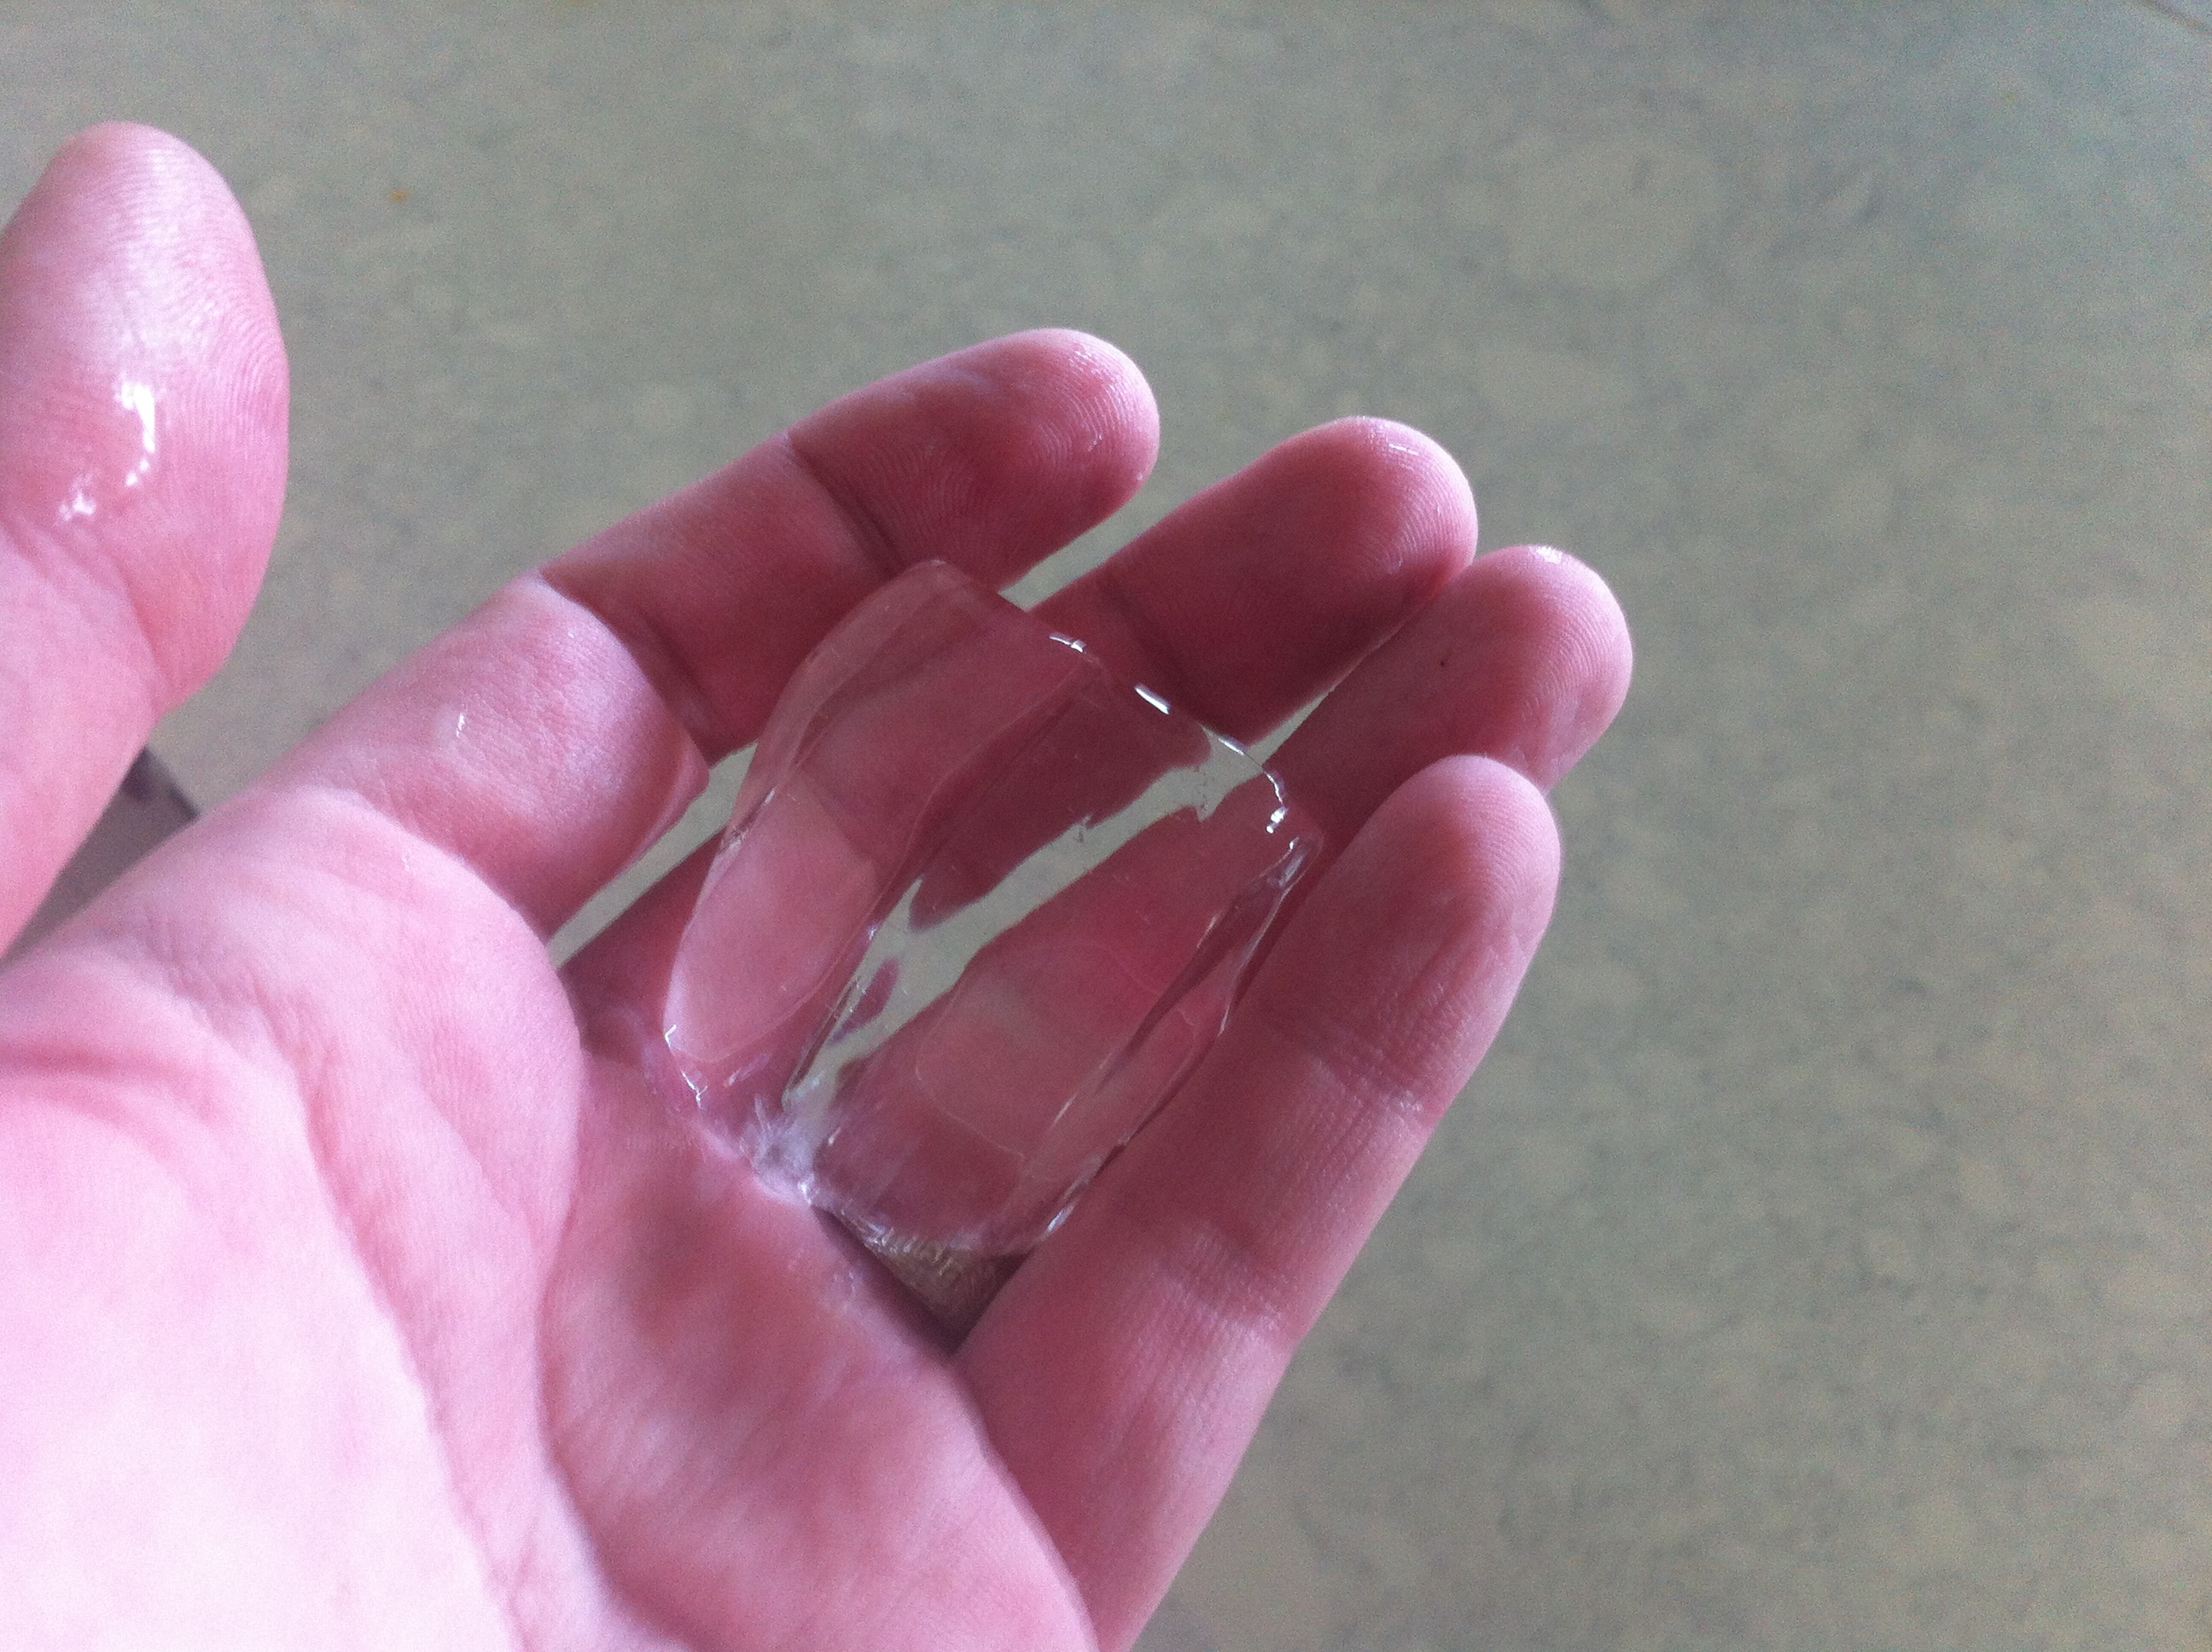
That’s a huge improvement over the original Krypton, no?
As you can see, what came out was a huge improvement. It was clear(ish), far less fractious, and generally highly easy to recommend. By the way, it was also fun recovering it from the frozen tray: You get to bash stuff.

You’ll want a mallet and icepick. In this case, I used a cheese cutter.
So that worked very well and was easy enough to do. But I kept noticing something that bugged me. Bubbles still trapped in the spheres.

Close, but not close enough… .
This is what I mean. At this point, by the way, it is safe to say I was obsessed and people I know would look at me funny when I would tell them about my pursuit of the crystal clear ice sphere. Once you say the words “Invert the mold in a tupperware container” people think you’re a lunatic, I assure you.
Nonetheless, I was on a mission. I wanted a crystal clear sphere. And that meant I had to commit. Since insulation was required to control the freeze, I had to get a cooler. I ordered one for something like $17 online. Since I live in an apartment in NYC I don’t have the jumbo freezer many Americans have in the cellar of their homes, so space is at a premium. I got the smallest hard cooler I could find, suitable for a six pack.
Would it help?

Would this do it?
I removed the lid, filled it the molds, filled the cooler with water, placed the molds with the hole down, and put it the whole thing in the freezer. You then need to apply patience. Since it is freezing from just one direction – the open top – it will take a long time to freeze. It was not ready in 24 hours. When I thought it was – more than a day later – I inverted the cooler on the counter until the block fell out on its own power.

With a block this big, you need additional tools: An ice pick and a chisel.
It took me a little while to figure this out, but the best thing you can do when it comes to this part is wait just a few minutes for the ice to “temper,” or warm up and get a little soft on the edges of the block. Then, using a knife, you should “score” the ice, cutting a slight groove from edge-to-edge of the block where you intend to pound in. The scoring needn’t be particularly deep, just a centimeter or less, and what it does is create a fault line that will help the block break neatly when you attack with the mallet and ice pick. Then you use the chisel to help separate.

Victory, of sorts.
As you can see, what came out was a significant improvement. I am still not at total clarity, but this is close enough to what I am trying to achieve for now. I will be experimenting with letting the water sit in the container to release air for a few minutes before sticking it in the freezer next time, along with some other methods, but all in all I think I am there.

That’ll do nicely.
If or when I ever live in a place that supports a larger freezer, and larger cooler, I think it’ll be a bit easier. There are still a few flaws, but broadly, this is victory.

If you’re using tap water, (and why not NYC has great water ) I think you may want to let the water stand open for a few days and let the chlorine evaporate and then cool the cube water in a fridge for some time for other potential gases to leave, Sound like the problem might be gaseous partial pressure, the closer you get the water stable near freezing temp. the less gas pockets you will get.
Or conversely, seal boiling water in a rigid pressure safe container and let the vacuum resulting from the cooling water shrinking pull dissolved O2 out of it.
That actually might be very effective,
Filtration might help, but one man’s impurities is a another man’s flavor
Fascinating suggestions, thank you so much! The first suggestion may require more patience than I am prepared for (or my wife is willing to put up with). The pressure method you describe… wouldn’t the oxygen that gets sucked out of it be reintegrated during decantation into the cooler?
Re-absorbtion is a much slower process, think fish tank air pumps, it’s not the bubbles that do the work, it’s the stirring of the surface, low surface area = low absorption, and the warmer the water the less dissolved gas, the thing is besides O2 there is CO2, N2 and maybe chlorine if you set up your cube device with the water as hot as you can manage that will keep dissolved gases to the minimum.
So I guess the second idea would work better than the first, you might not even need the vacuum part, just try starting with boiling water and see if it makes a difference,
Good luck
Have you tried using a wire over a stainless steel pot full of water? Silicone ice ball makers like Ice Sphere Tech are perfect for this method for making clear ice rounds.
I’ve seen that technique but not tried it as yet. As you can see I got pretty close to total clarity using this inversion method… .